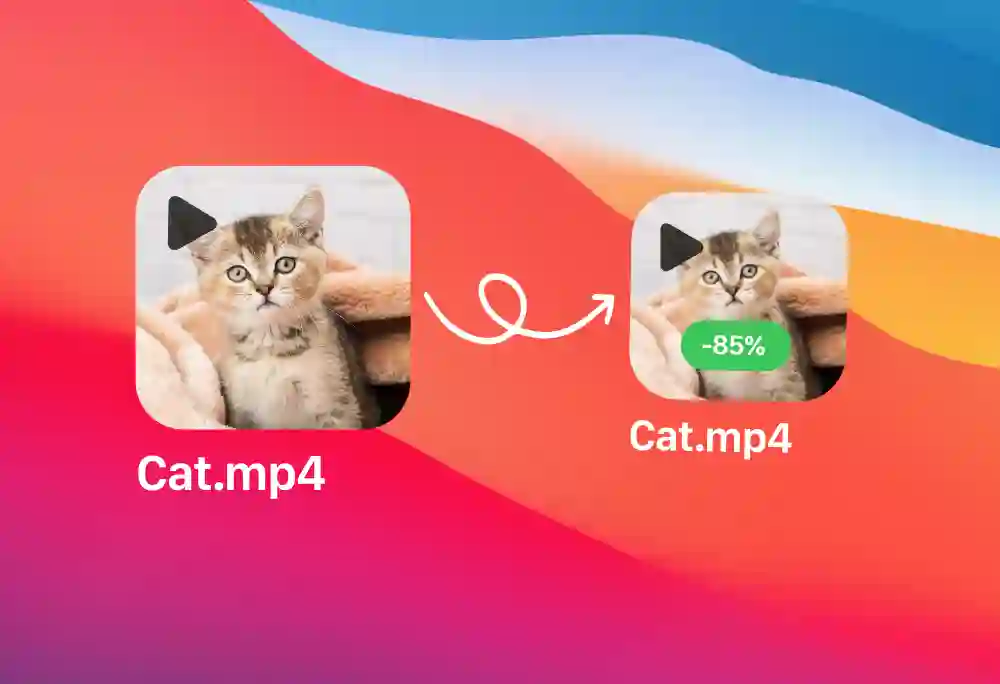
When to Compress Your Videos
Compress videos when you need to upload them to social media. YouTube and Instagram have size limits. Smaller files upload faster and process quicker.
You should also compress before sharing videos via email. Most email services limit attachments to 25MB. A compressed video fits those limits.
Finally, compress videos to save storage space on your Mac. If you edit videos regularly, compressed copies let you keep more projects on your drive.
Method 1: Use QuickTime for Basic Compression
QuickTime Player offers the fastest way to reduce video file size on Mac. The built in app handles basic compression without any setup.
This method works when you need quick results. You sacrifice control for speed. QuickTime gives you limited options but takes almost no time.
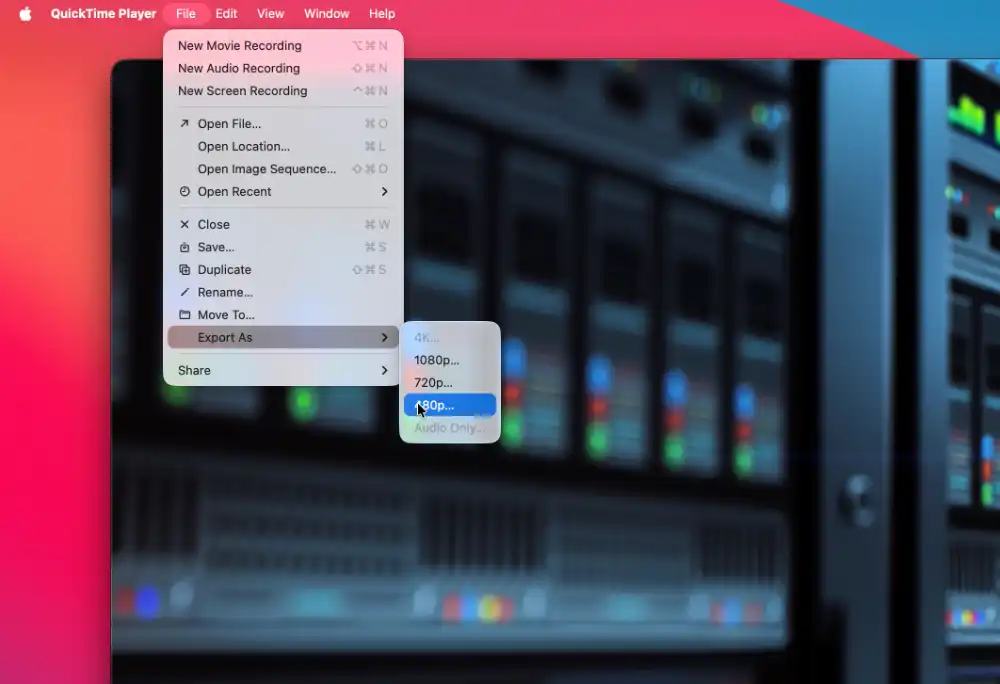
Compress Videos with QuickTime Player
Right click your video file. Select "Open With" and choose QuickTime Player. Your video opens and starts playing.
Click "File" in the menu bar. Hover over "Export As." You see several resolution options.
Pick a lower resolution than your original video. If you have a 4K video, choose 1080p. If you have 1080p, choose 720p.
Click "Save." QuickTime exports a compressed version of your video.
The process takes about 1 minute per 10 minutes of video. You end up with a file that's 50 to 60% smaller.
When to Use QuickTime
Use QuickTime when you need something compressed right now. No downloads. No complicated menus. Just open and export.
QuickTime works well for videos you want to share quickly. Text a video to a friend. Email a clip to a colleague. The smaller file sends faster.
Don't use QuickTime for projects where quality matters. The compression is aggressive. You lose detail. For professional work, stick with HandBrake or TinyFast.
Method 2: Use HandBrake for Maximum Control
HandBrake gives you the best compression results. This free tool reduces file size by 60 to 80% while keeping good quality. In their 2025 review, TechRadar called it "undeniably powerful tool that can handle just about any video format you’d care to throw at it". But it also noted that it "Can feel intimidating at first".
HandBrake works with all video formats. It handles batch processing. You can compress dozens of videos at once.
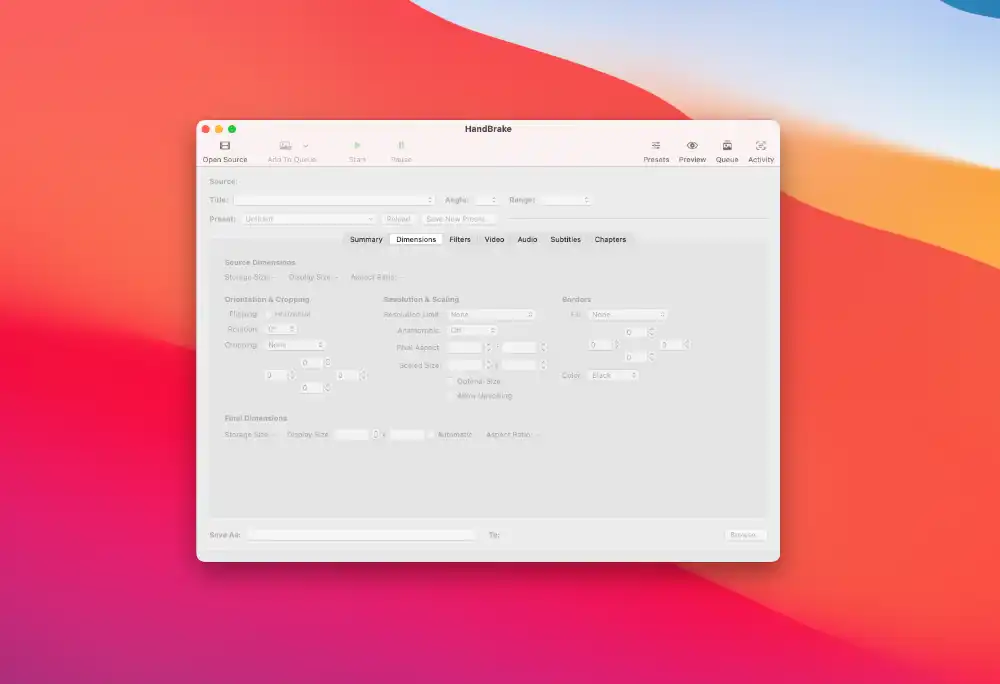
How to Compress Videos with HandBrake
First, download HandBrake from the official website. Install it like any Mac app.
Open HandBrake. Drag your video file into the window. The app analyzes your video and shows you the current size.
Choose a preset from the right sidebar. Start with "Fast 1080p30" for most videos. This preset balances quality and file size well.
Look at the video quality slider. The default sits at 22. Lower numbers mean higher quality but bigger files. Higher numbers mean smaller files but lower quality. Keep it between 22 and 28 for best results.
Select your output location. Click "Start Encode" at the top. HandBrake processes your video. A 10-minute 1080p video typically takes 3 to 5 minutes to compress.
Advanced HandBrake Settings
You can reduce file size even more with custom settings. Click the "Video" tab. Change the encoder to H.265 instead of H.264. H.265 creates files 25 to 40% smaller at the same quality.
Under "Dimensions," you can change resolution. Drop 4K videos to 1080p if you don't need ultra-high definition. This cuts file size by 70%.
The "Audio" tab lets you adjust audio quality. Most viewers can't tell the difference between 320kbps and 160kbps audio. Lower bitrate saves space.
Method 3: TinyFast for Quick Compression with control

TinyFast specializes in fast video compression. This Mac app strips away complicated options and focuses on speed. You get smaller files without wrestling with technical settings. You just have one option: Compression level.
TinyFast works best when you need results now. You drag a video in, pick a quality level, and get a compressed file. Perfect for regular compression tasks.
Steps to Reduce File Size with TinyFast
Download and install TinyFast from the Mac App Store. Launch the app from your Applications folder.
Set the desired compression level. Then, drag your video file into the TinyFast window. The app immediately shows you the current file size and estimated compressed size.
TinyFast processes your video using optimized settings. A 10 minute video typically compresses in 1 to 2 minutes.
When the compression is done you can simply drag and drop the video out to your desired folder.
TinyFast Benefits
TinyFast handles batch processing. Drop multiple videos into the app and compress them all at once. This saves massive amounts of time.
The app automatically chooses the best settings for each video. You don't need to to know if your video is MP4, MOV or M4V. TinyFast picks the right option.
For users who want simplicity with good results, TinyFast hits the sweet spot. You get better compression than QuickTime with less complexity than HandBrake.
Comparing the Three Methods
Each method has strengths. HandBrake gives you maximum control and best results. You can compress files by 70 to 80% without noticeable quality loss.
TinyFast balances ease and quality. You get better results than QuickTime with a simple interface. Good for regular compression tasks and batch processing. Especially if you are a Web or App developer.
QuickTime wins in first time use speed. It's already installed on your Mac. You compress videos in seconds. Quality suffers, but you save time installing a third party app.
Which Method Should You Choose
Choose HandBrake if you compress videos regularly and want maximum control. The initial learning curve pays off. You get professional results every time. Ideal for video production.
Choose TinyFast if you want simple controls with solid quality. The app handles technical decisions for you. Batch processing makes it perfect for multiple videos. Ideal for designers, web & app developers.
Choose QuickTime for emergency compression. When you need a smaller file in the next five minutes, without installing anythig.
Bonus: For Advanced users
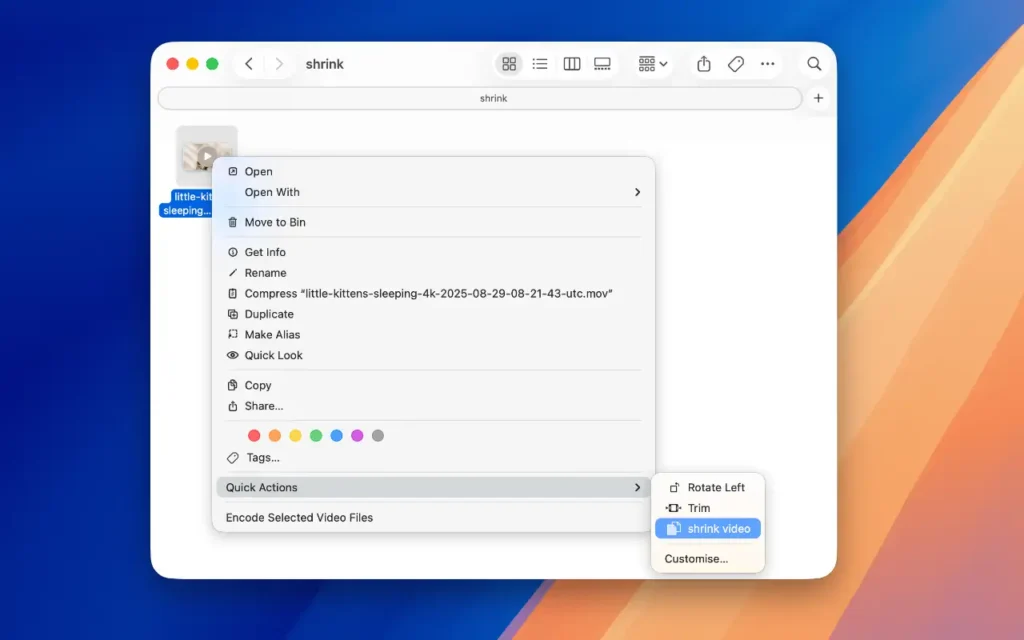
On mac you can create a Quick Action that adds a right-click menu option to compress videos using FFmpeg directly from Finder. If you wish to use this method we have a guide here

